A Post About Monitor Calibration:
Sorry for the lack of posts! My computer screen was blacking out intermittently, so I sent it back to Apple. On a side note, I am so glad that I bought Applecare! They replaced the screen, and gave me an additional 90 days on my warranty (I only have a few days left to my Applecare). It took a total of three business days, and I received it in the morning as well. Anyway, because of that, I have been busy reloading all the software back into my computer (one suggestion before I ship the computer was to do a clean install), and it’s been taking me ages. Since I’m still having a bit of difficulty locating all of my software, I thought I’d do my monitor calibration.
I’m pretty sure there are many of you who are either experts at this, and many who don’t really even know about monitor calibration. I’m definitely not an expert at this but since this is a blog (a photoblog no less), I thought some of you might find it a little interesting to see what I do to calibrate my screen. I’m hoping this post will help any of you who are thinking about purchasing equipment to calibrate your monitors or those who don’t even know what monitor calibration is.
Why is Monitor Calibration so Important?:
Well, think about it, many of us spend a small fortune on camera equipment…If you’re buying Leica (and many of you who visit this blog probably do), you’re probably spending enough to buy a decent car. And why do we spend so much on our photographic equipment? The simple answer is because we want the best possible image. Well, that’s pretty hard to achieve without a monitor that gives you the correct color.
It is true that some of these colorimeters used for monitor calibration are expensive. I use the X-Rite Eye-One Display 2, and that unit can cost almost $200. There are some that cost even more than that. But if you’re spending all that time working on your images, don’t you want the print to reflect your work? It simply does not make sense to spend all that time post-processing only to find out that when you finally print it, all the colors are out of wack. When I first got into digital, I remember working on this one print, and how much I loved it. Then, when I brought it over to the lab, I found that not only were my colors different, the print was extremely dark.
Moreover, monitor calibration can make a HUGE difference, especially if you’re like me, and you use a laptop screen. I love the Macbook Pro LED laptop screens because they are so bright and vivid but this is also a huge problem when I’m post-processing. With my monitor correctly calibrated, I get much more truer colors, and the luminance is correct. It turned out that my screen was way to bright, and there was a blue cast that I did not notice until I did the monitor calibration. You have to think of monitor calibration as a way of standardizing…so that if you were to bring your print to another correctly calibrated computer, you would essentially get the same looking image. With correct monitor calibration, you should be able to print your print from a lab, and have it come back the way that you expected it to be with little or no adjustment done to the print.
Why Did I Choose The X-Rite Eye-One Display 2 For Monitor Calibration?:
You have a variety of colorimeters to choose from for monitor calibration but the reason for why I chose the X-Rite Eye-One Display 2 was because Mpix suggested it. Simple as that. Mpix is where I mainly print my photos, and so I wanted my computer to match as closely as possible to Mpix’s printers and paper types. I pretty much matched my settings to whatever Mpix suggested I do plus I also downloaded their ICC profiles for soft proofing. And for the most part, my images come out great in print.
How to Calibrate a Monitor With The X-Rite Eye-One Display 2:
I thought I’d give you guys a basic tutorial of what I do to get my monitor calibrated using the X-Rite Eye-One Display 2. Again, I’m no expert in monitor calibration but it seems to work for me because I have no complaints when I make prints out of my work. I’ve also printed for clients, and they’re happy with the results as well.
Step 1:
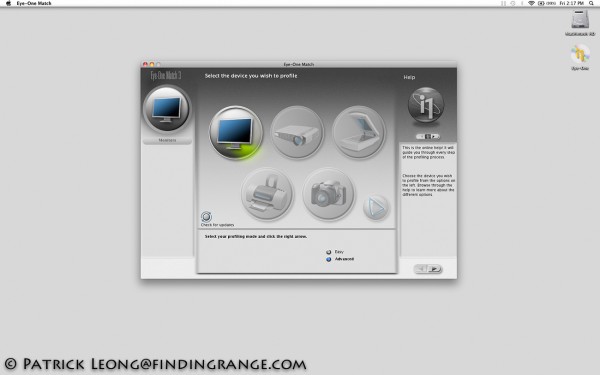
Choose between easy or advanced. Since easy is pretty straight forward, I am going to show you advanced.
Step 2:
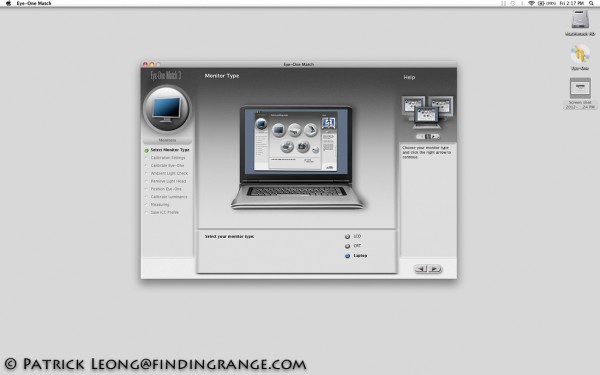
Pick the type of screen that you have. In this case, I picked the laptop option.
Step 3:
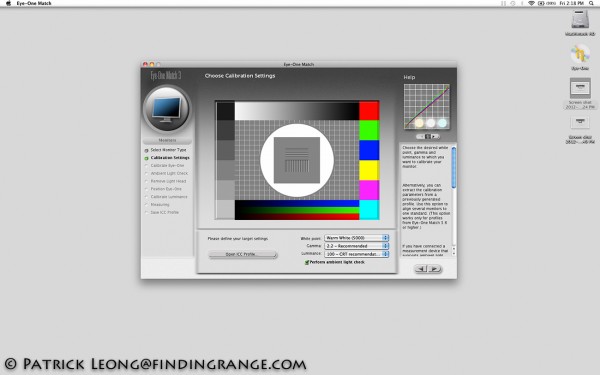
For this part, I took the emailed Mpix, they told me to chose 5000 for my White Point, 2.2 for my Gamma, and 100 for my Luminance. I don’t get anything from Mpix but their service is outstanding. Not only are their prints top notch, their service is fast, and very good. They emailed me back in only a few minutes. You can also choose the ambient light check to see how your room lighting is.
Step 4:
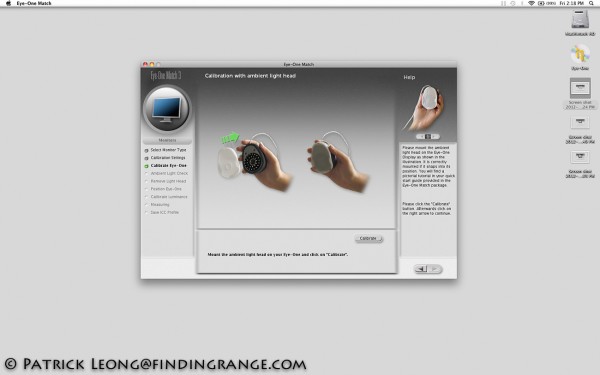
This is straightforward: All you had to do is place the cap back on the colorimeter, and choose calibrate. Once you have calibrated the device, you can move forward to the next step.
Step 5:
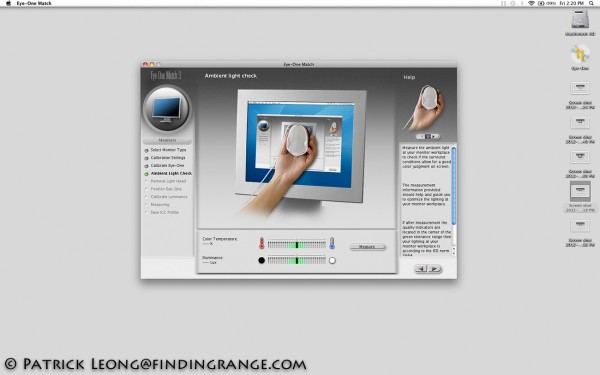
If you chose the ambient light check in Step 3, you can measure the room lighting’s color temperature and illuminance.
Step 6:
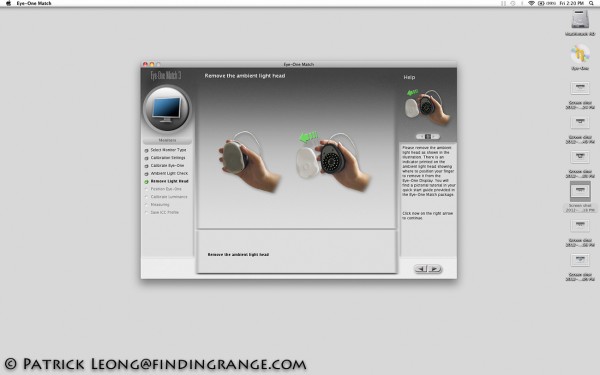
Take the ambient light head off.
Step 7:
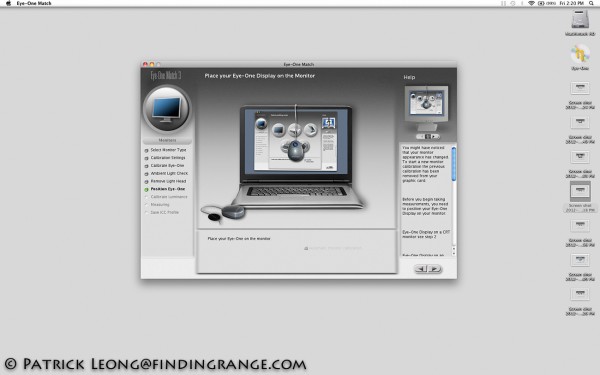
Place the colorimeter on the screen.
Step 8:
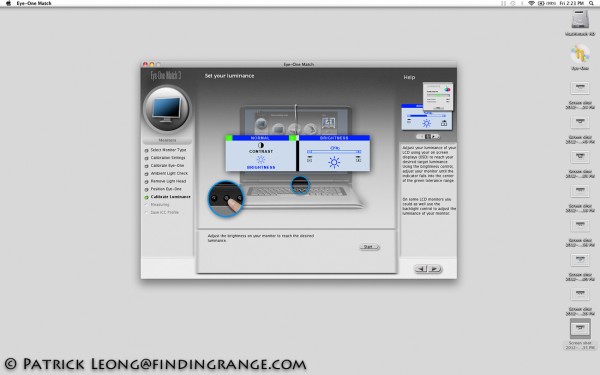
You can manually adjust the brightness of your monitor to reach the desired luminance. After that, you move on to the next screen, and monitor calibration is pretty much automatic.
Monitor Calibration is a Must for Serious Photography:
I hope this post helps some people who are either having difficulty with monitor calibration or people who are still thinking about buying a colorimeter. Again, I am no expert on monitor calibration but I can tell you that my monitor works perfectly, and my prints come out pretty much the way I intended them to come out. I have no complaints from clients or more importantly from myself. It’s really nice to know that my monitor is standardized. I wholeheartedly recommend that you buy a colorimeter, and see the HUGE difference that it can make. I don’t know how other colorimeters perform but the X-Rite Eye-One Display 2 is great, and I have had no issues whatsoever. It’s extremely straight foward to use as well. I’ve lent mine to four people who have varying degrees of computer competency, and every single one of them have calibrated their monitors without any help.
In my opinion, there’s no reason to buy expensive photographic equipment if you don’t calibrate your monitor. It’s simply a waste. You’ll never get the full potential of what your equipment has to offer without monitor calibration. While colorimeters can be expensive, in the long run, it’s cheap compared to how much you might spend on your camera and lenses, plus all that time wasted post-processing images that come out bad because your monitor wasn’t calibrated.
